
A greenhouse watering system is kind of like your most reliable garden helper… until it isn’t. A little routine upkeep prevents the usual headaches: clogged emitters, sneaky leaks, weak pressure, and plants that look “off” even though you swear you watered. The good news? You don’t need a fancy setup to benefit from basic maintenance. These habits work for everything from a simple drip line to a more dialed-in small greenhouse watering system.

- Irrigation Maintenance: Step-by-Step
- How to Prevent Waterborne Diseases & Algae Growth
- How to Protect Greenhouse Watering System in Winter
Irrigation Maintenance: Step-by-Step
Think of this as your quick “systems check.” You’re making sure water is flowing cleanly, pressure stays steady, and every plant is actually getting watered (not the walkway). You’ll do the same core checks whether you’re running a larger greenhouse or something compact like a mini greenhouse on wheels. And if you’re still building your setup, start here: greenhouse watering system ideas.
1. Clean the filter
- Why: Filters catch grit, rust, algae, and mineral bits before they jam up your emitters. When they clog, everything downstream gets weak—even if the system is “on.”
- How: Pull the filter, rinse it, and gently brush off buildup. If it’s really nasty, soak it in clean water first, then rinse. Replace torn mesh or filters that never seem to come clean.
2. Hunt down leaks (before they get worse)
- Why: Small leaks waste water, create muddy corners, and can quietly damage benches, framing, or flooring.
- How: Run the system and walk the lines. Look for drips at fittings, soft spots under tubing, or “mystery puddles.” Tighten connections, replace cracked tubing, and swap worn washers or gaskets.
3. Check emitters and spray coverage
- Why: Drippers get bumped, sprinklers get mis-aimed, and clogged emitters turn into dry pots and stressed plants.
- How: Confirm each emitter is watering the root zone—not the aisle. Clean clogged emitters, replace the stubborn ones, and re-aim sprayers so you’re not misting walls and windows.
4. Winterize before freezing weather
- Why: Trapped water freezes, expands, and cracks plastic parts, tubing, and fittings.
- How: Shut off the supply, open end caps/flush valves, and drain the system completely. Bring in portable pieces like hoses, manifolds, and timers and store them somewhere frost-free.
5. Check the timer/controller
- Why: If the “brain” fails, watering can go sideways overnight—either everything dries out or the system runs too long.
- How: Confirm start times, zone duration, and the clock (power outages can reset these). Replace batteries if your controller uses them and adjust run times as seasons shift.
6. Descale misters and nozzles
- Why: Mineral buildup and algae turn a fine mist into an uneven dribble.
- How: Remove clogged nozzles, soak them in a mild vinegar solution, then rinse well. Replace any that still spray unevenly after cleaning.
7. Inspect tubing and lines for wear
- Why: UV exposure, foot traffic, and temperature swings can weaken tubing and cause pinholes or splits.
- How: Look for kinks, crushed sections, or sun-brittle cracks. Replace the questionable pieces before they fail mid-weekend.
8. Watch your water pressure
- Why: Too much pressure can pop fittings. Too little means weak output and uneven watering.
- How: Use a basic pressure gauge near the start of the system (and after regulators if you have them). Small setups are especially sensitive, including a small greenhouse watering system.
9. Keep a quick maintenance log
- Why: You’ll spot patterns—like filters clogging every 3 weeks or a leak that keeps coming back in the same spot.
- How: Write dates of cleanings, replacements, and winterizing in a notebook or phone note. Pair these checks with other greenhouse tune-ups like regulating greenhouse temperature.
Best Practices for Preventing Waterborne Diseases & Algae Growth:
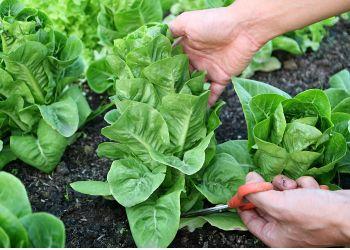
It’s easy to focus on “how much water,” but in a greenhouse, water quality is just as important. Dirty water and stagnant lines encourage algae, slime, fungus gnats, and root issues. The goal is clean flow, good drainage, and fewer constantly-wet surfaces. Combine this with solid greenhouse ventilation, and you’ll avoid a lot of greenhouse drama.
1. Start with clean water
- Importance: If the source water is dirty, your system is always playing defense.
- Practice: Use filtered tap/well water when possible. If you collect rainwater, keep gutters and barrels clean so you’re not feeding debris into your lines.
2. Use proper filtration
- Importance: Filters reduce clogs and slow biofilm growth inside tubing.
- Practice: Place a filter at the main source and add extra protection before misters or delicate emitters. Clean/replace on schedule.
3. Flush the system regularly
- Importance: Line ends and low spots collect stagnant water—perfect for algae and bacteria.
- Practice: Open end caps/flush valves and run water until it clears. This is extra helpful after fertilizer feeds or long gaps in use.
4. Sanitize occasionally (and safely)
- Importance: Prevents biofilms from slowly taking over the inside of lines.
- Practice: Use a mild bleach solution or hydrogen peroxide following safe dilution guidelines to sanitize the system, then flush thoroughly with clean water before watering plants again.
5. Prefer drip irrigation where possible
- Importance: Constantly wet foliage and surfaces invite fungus and algae.
- Practice: Use drip lines/emitters for beds and pots when you can. It’s efficient and reduces leaf-wetness problems.
6. Improve drainage
- Importance: Standing water under benches or in trays turns into algae, gnats, and root stress.
- Practice: Use trays with drainage, keep pots elevated, and aim for a floor that drains well. Strong greenhouse design helps too—many polycarbonate greenhouse kits are easier to keep tidy because the structure stays tight and stable.
7. Monitor while you water
- Importance: Early detection saves you from big cleanups.
- Practice: When you’re checking plants, also scan tubing, emitters, and floor areas. If you see slime or algae, clean it and trace back the constant moisture source.
8. Consider beneficial microbes
- Importance: Beneficials can outcompete the “bad guys” around roots and in media.
- Practice: Use products with beneficial bacteria or mycorrhizal fungi per label directions.
9. Clean pots and tools between batches
- Importance: Dirty trays and tools can move disease from one area to another.
- Practice: Wash and disinfect trays, flats, and pruners when you start a new round of seedlings, especially if you’ve battled root rot or mildew.
How Can I Protect My Greenhouse Watering System During Winter?
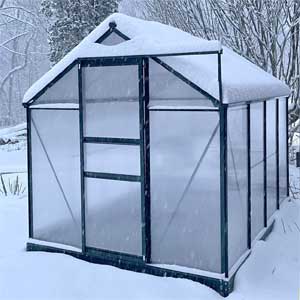
Winter can destroy irrigation gear quietly and expensively. Freezing water cracks tubing, splits fittings, and ruins timers. If your greenhouse shuts down for winter, draining and storing parts is usually enough. If you grow year-round, you’ll need a plan that protects both plants and plumbing—start here: greenhouse heating strategy in winter.
1. Drain the system fully
- Why: Freeze expansion is what breaks stuff.
- How: Shut off the source, open valves/end caps, and let gravity do the work. Lift low spots if needed to get stubborn water out.
2. Remove and store sensitive parts
- Why: Timers, pressure reducers, and manifolds survive much longer indoors.
- How: Detach what you can, label parts if needed, and store dry in a frost-free spot. Clean them now so spring startup is painless.
3. Insulate exposed lines
- Why: Pipes near exterior walls or outdoors freeze first.
- How: Wrap with foam insulation or pipe wrap. In colder zones, use heat tape rated for the job and follow safety instructions.
4. Use heat + airflow if you grow in winter
- Why: Warm air at the roof doesn’t protect pipes near the floor.
- How: Use a thermostat-controlled heater and keep air moving so warm air circulates throughout the space.
5. Add targeted heat where needed
- Why: Some sections freeze faster (main feed lines, cold corners, benches).
- How: Use heat cables near critical pipes or heat mats under benches where tubing runs—always per manufacturer instructions.
6. Monitor temperature (don’t guess)
- Why: Cold snaps happen fast.
- How: Use a thermometer or remote sensor near vulnerable plumbing and set alerts if possible.
7. Protect outdoor water sources
- Why: Rain barrels and spigots can freeze solid and crack fittings.
- How: Drain what you don’t need, insulate what you do, and only use de-icers/heaters where appropriate and safe.
8. Winterize electronics
- Why: Freezing temps + batteries + moisture = trouble.
- How: Bring controllers indoors if they don’t need to run, and remove batteries to prevent corrosion.
9. Do quick winter check-ins
- Why: Storms, critters, and shifting soil can create new problems.
- How: Inspect a few times through winter so you’re not surprised in spring when you’re ready to start watering again—or when you’re bringing a new greenhouse kit online.
Frequently Asked Questions
How often should I clean my greenhouse irrigation filter?
Start with every 2–4 weeks during active growing, then adjust based on how dirty it gets. If you’re seeing pressure drops or clogged emitters, check the filter first.
What’s the easiest way to tell if emitters are clogging?
Look for uneven plant growth, dry pots next to healthy ones, or drippers that barely flow. A quick walk-through while the system runs usually reveals the problem spots.
Can algae in trays really cause plant problems?
Yes. It’s a sign of constant moisture and poor airflow. That combination invites fungus gnats and root stress. Improve drainage and airflow, and clean up the algae source.
Should I sanitize my irrigation lines?
Occasionally, yes—especially if you notice slime/biofilm or recurring root issues. Use safe dilution and flush well afterward. The CDC’s chemical disinfection guidance is a good reference for basics: sanitizing with chemical disinfectants.
Do I need to winterize if my greenhouse stays heated?
If you truly maintain above-freezing temps everywhere (including near the floor and exterior walls), you may not need to fully drain. But you should still insulate vulnerable lines and monitor temps closely during cold snaps.
Conclusion
A greenhouse watering system doesn’t need constant babysitting—but it does need consistent check-ins. Clean filters, stable pressure, and quick leak fixes keep your plants happier and your weekends calmer. Pair that with clean water habits, drainage, and good airflow, and you’ll prevent most algae and disease issues before they even start.
If you want to tighten up your setup even more, it helps to review your full watering layout once or twice a year and adjust run times as plants grow. That’s how a simple system becomes a reliable one.


