
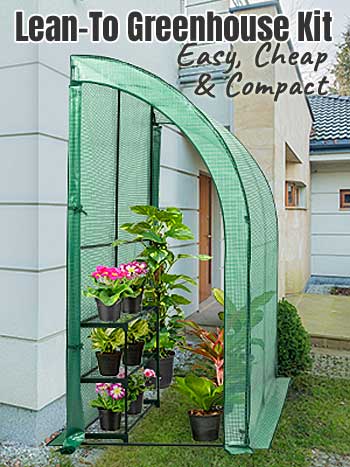
If you want a greenhouse but don’t have a huge backyard to give up, a lean-to kit is a really practical move. It lets you “borrow” a wall—your house, garage, shed, or even a solid fence—so you can grow more without swallowing your whole outdoor space. If this wall-attached style sounds like your kind of setup, you’ll probably enjoy this roundup of lean-to greenhouse kits and ideas for small backyards.
The big appeal is how simple it can be. These kits typically provide everything you need—pre-cut frame parts, the hardware, and a fitted cover—so you can get a walk-in growing space without turning this into a full construction project. For many gardeners, it’s the perfect stepping stone toward a small year-round greenhouse setup.
What Is a Lean-To Greenhouse?
A lean-to greenhouse is basically a slim greenhouse that relies on an existing structure for one “side.” Instead of having four independent walls, it attaches to a building and the roof slopes outward to catch light. This design shines in narrow side yards, along garages, and in tight urban backyards where a freestanding greenhouse would feel like a space hog.
Another bonus: because it’s up against a solid wall, you get a little extra thermal buffering. That doesn’t replace real winter heating, but it can make shoulder seasons more forgiving. To get the most light, it helps to place it intentionally using sun exposure planning—especially if you’re trying to grow in cooler months.
How to Set Up an Attached Walk-In Greenhouse
The nice thing about this style is that setup can be very doable, even if you’re not the “DIY every weekend” type. You can assemble this mini lean-to greenhouse in just a short time because the frame sections are designed to slide and snap together, and the cover is made to fit without wrestling it for hours.
Most kits come with stakes, guy lines, and bolts so you can secure it to the wall and/or into the ground. If you’re using it seasonally, you can keep the anchoring light and treat it like a movable greenhouse. Since the whole structure is relatively lightweight (often under 20 pounds), repositioning it is realistic for many gardeners.
Even with a small footprint (around 23 square feet), the walk-in height is what makes it feel useful. You can step inside, water, move trays around, and actually use shelves—without doing everything from the outside like a cold frame.
Because it hugs a wall, it tends to “disappear” visually in a good way. It fits along a garage or fence line without turning your yard into a construction zone. If you’ve been stuck doing container gardening only, this can feel like a major upgrade.
Is a Kit Better Than Building One Yourself?
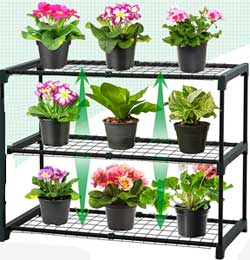
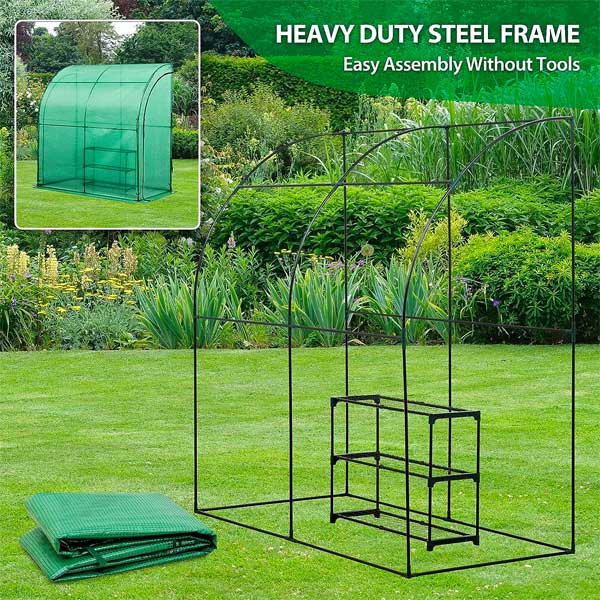
If you’re just getting into home growing, a kit is often the easier (and sometimes cheaper) path. Many lean-to kits start around the $100 range and include not only the frame and cover, but also a 3-tier plant rack like the one shown here. That rack is a big deal—it instantly gives you vertical growing space, which is what makes a small greenhouse feel “bigger” inside.
When you build from scratch, the costs add up quickly: lumber or metal framing, fasteners, hinges, glazing (polycarbonate or film), plus the tools and time. By the time you’re done, a small DIY build can cost as much as (or more than) a ready-made kit. For many beginners, a kit is a smart test run before moving up to more permanent backyard greenhouse kits.
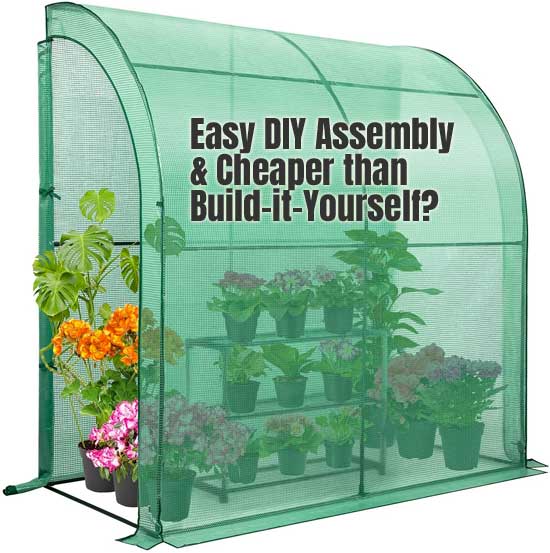
Once it’s up, you can organize the space in a really satisfying way: seedlings and herbs on upper tiers, medium pots at waist height, and bigger containers on the ground. That layout makes it easier to keep plants watered, rotated, and healthy—without turning your side yard into chaos.
Pros and Cons of a Low-Cost Wall Greenhouse
This type of kit is best when you use it for what it’s great at: seed starting, compact crops, and protecting tender plants during chilly stretches. It’s not ideal for tall fruit trees, huge grow bags, or heavy “production garden” ambitions. The footprint is small, so smart shelving and plant choice matter.
The other trade-off is durability. A lightweight frame and soft cover aren’t designed for heavy snow loads or extreme wind. Attaching it to a wall improves stability, but if your weather gets intense, a sturdier wooden-framed or aluminum-and-panel greenhouse usually holds up better long term.
A Practical Buying Guide for Wall-Attached Greenhouses
Whether you buy a kit or build your own, your results come down to the same basics: good placement, decent airflow, and a layout that makes you want to use the greenhouse (not avoid it because it’s cramped). Here’s what’s worth thinking through.
Why Gardeners Love Lean-To Greenhouses
1) They’re space-smart. Lean-to greenhouses sit right against a structure, which means you can use those awkward strips of yard most people ignore. It also keeps water access, tools, and power closer than a greenhouse placed in the far corner of the yard.
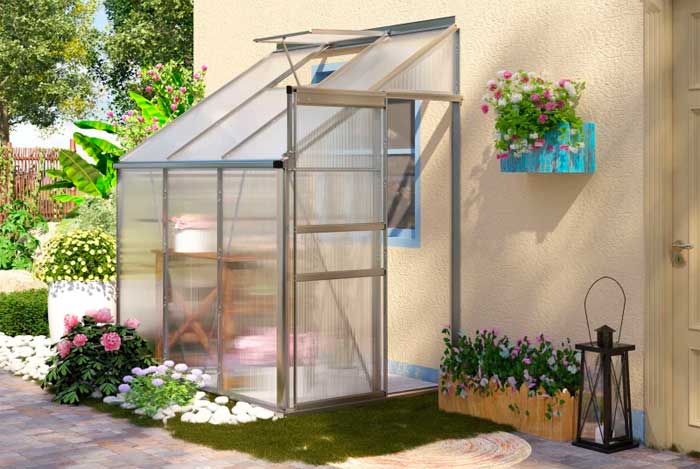
2) They can cost less. Since one wall is already “built” (your house/garage wall), you’re often paying for fewer panels and less framing compared to a similar-sized freestanding greenhouse.
3) Light can be excellent when sited correctly. A good lean-to placement can capture strong sun for much of the day. Add roof vents and you’ll have a bright spot that’s perfect for seedlings and compact veggies.
4) They’re naturally more stable. The attached wall gives extra support in wind, and it can slightly reduce cold drafts—especially compared to a freestanding soft-shell tent in an exposed part of the yard.
Ready-Made Kit vs DIY Build
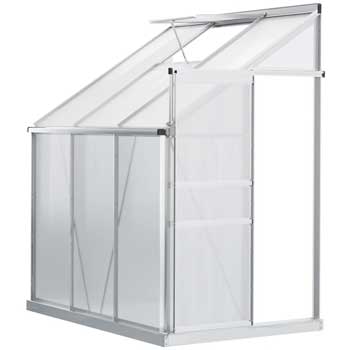
Go with a kit if you want speed and fewer decisions. A ready-made lean-to kit usually arrives with the frame, panels/cover, vents, and instructions.
Build from scratch if you want a custom size, specific materials, or a particular look. DIY gives you more freedom, but also more planning, more tools, and more time troubleshooting the “little stuff” (door seals, vent placement, leaks, and anchoring).
Choosing the Right Size
Measure the wall length you’re willing to dedicate, then decide how “walk-in” you want it to feel. If you’ll mainly start seeds and grow herbs, smaller is fine. If you want containers, shelves, and a work zone, you’ll appreciate extra length. This guide on choosing the right greenhouse size helps you avoid the most common sizing mistake: going too small.
What You’ll Need: Materials and Setup Basics
Whether you buy a kit or DIY, most wall greenhouses are built from the same building blocks:
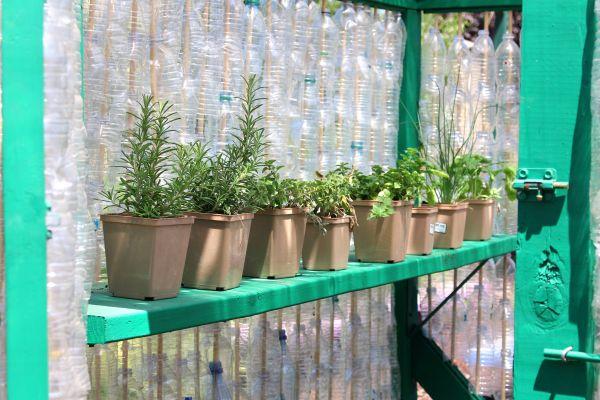
- Frame: Aluminum or galvanized steel in kits; wood in many DIY builds.
- Glazing: Polycarbonate panels for durability and insulation; reinforced film for budget builds.
- Door: Hinged or roll-up, ideally with a decent seal.
- Vents: Roof vents (and sometimes side vents) to dump heat and control humidity.
- Anchors/Hardware: Fasteners to keep the greenhouse secure and attached.
Assembly Tips That Make It Easier
Most lean-to kits only need basic tools (screwdriver, wrench, tape measure, ladder). Follow the manual in order and don’t “tighten everything to death” until the frame is fully aligned. If you want a more rigid, hard-sided option, the Palram Hybrid Lean-To Greenhouse Kit is a good example of a sturdier kit style that’s still DIY-friendly.
If you’d rather keep it tool-free and seasonal, the Eagle Peak style is designed to assemble quickly and come down when you’re done with the season.
Climate Control in a Small Wall Greenhouse
Small spaces heat up fast. Even in cool weather, sun hitting a wall-attached greenhouse can spike temps quickly. That’s why ventilation matters from day one. Roof vents, roll-up doors, and (if needed) an automatic opener will save you from “surprise sauna days.”
If you plan to grow through cold nights, you may also want basic insulation and backup heat. Bubble wrap on panels, a small heater, or seedling heat mats can help—this guide on heating a greenhouse in winter gives practical options without overdoing it.


Permits and Setbacks
Before you attach anything to your home or place a greenhouse tight to a fence line, do a quick check on local rules. Some areas care about setbacks, height, or whether anchoring makes it “permanent.” It’s a five-minute call that can save a lot of frustration.
Frequently Asked Questions
Does a lean-to greenhouse stay warmer than a freestanding greenhouse?
Usually a little, because the attached wall buffers wind and cold. It’s not a magic heater, but it can make shoulder-season growing easier.
What’s the best wall direction for a lean-to greenhouse?
In many climates, a south-facing wall gets the most winter sun. West-facing can also work well. Use sun exposure planning to avoid shade from fences, trees, and rooflines.
Can I use a soft-cover lean-to greenhouse year-round?
In mild climates, yes—especially for cold-tolerant greens and seed starting. In harsh wind/snow areas, soft covers can struggle, and a hard-sided kit may be a better match.
Do I need to anchor a wall greenhouse?
If you get wind, anchoring is strongly recommended. Even lightweight kits do better when secured to the wall and staked properly.
What plants do best in a lean-to greenhouse?
Herbs, salad greens, seedlings, and compact vegetables are perfect. You can also grow container tomatoes and peppers if you stay on top of ventilation and support.
Conclusion
A lean-to greenhouse kit is one of the simplest ways to get a protected growing space when you’re short on yard and long on gardening goals. Pick a sunny wall, plan for airflow, organize with shelves, and you’ll be amazed how much you can grow in a compact footprint. If you’re ready to compare styles, browse lean-to greenhouse kits and ideas and keep your longer-term goal in mind—whether that’s seed starting each spring or building toward a year-round greenhouse routine.


